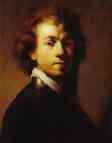
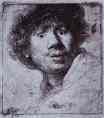
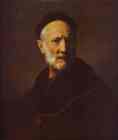
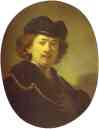
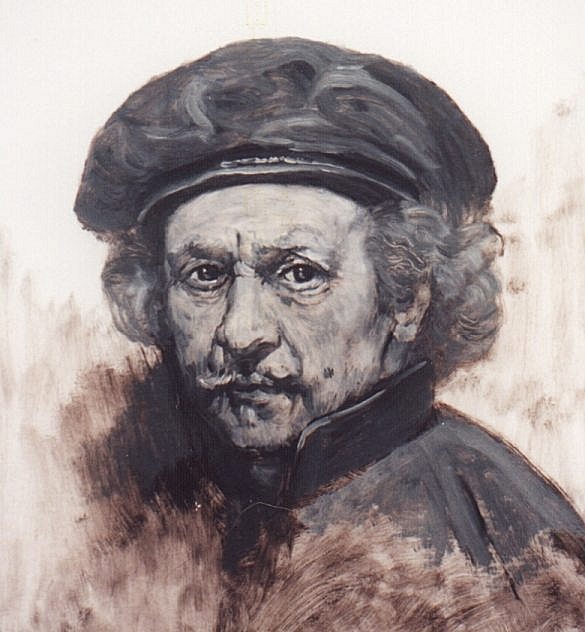
My Attempt at a Rembrandt self portrait
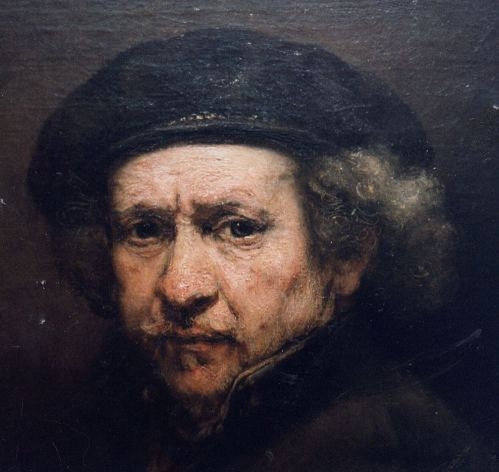
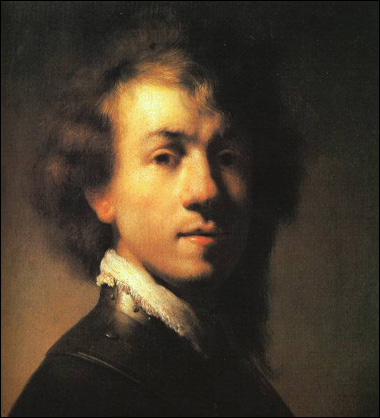
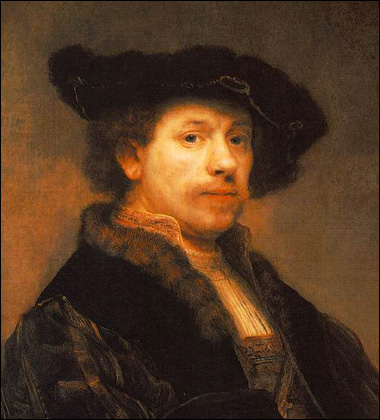
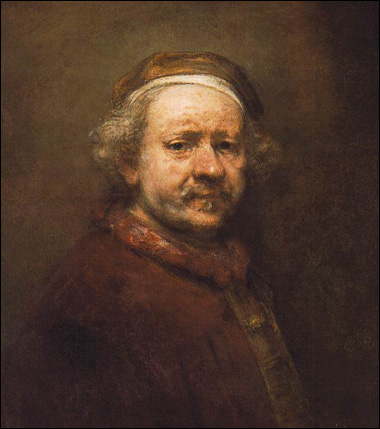
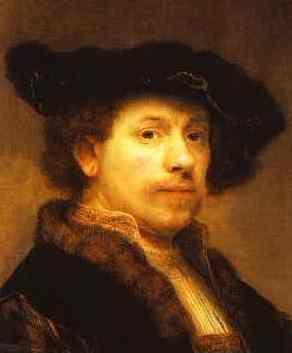
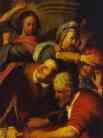
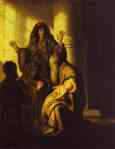
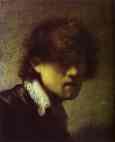
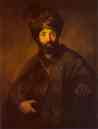
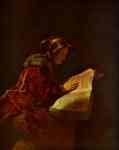
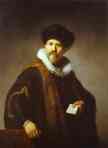
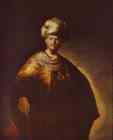
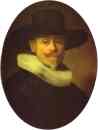
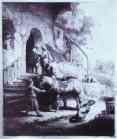
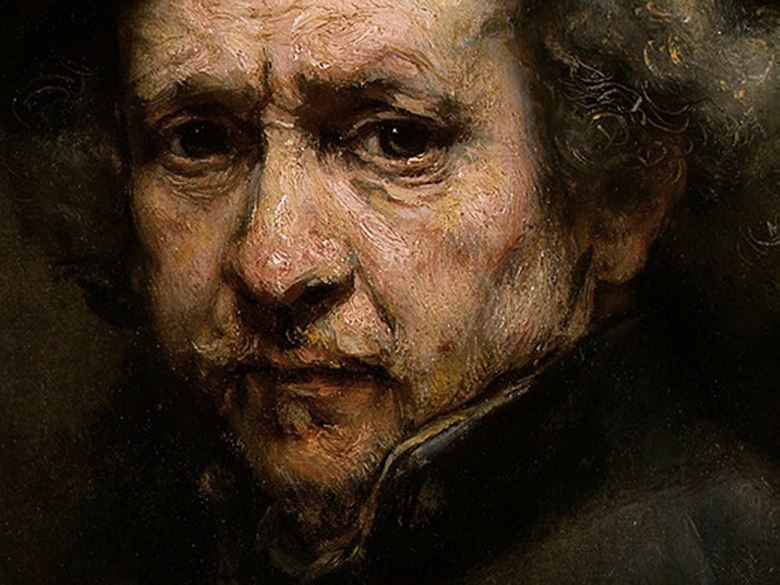
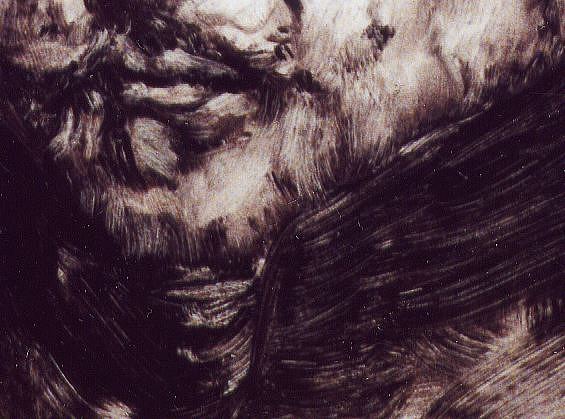
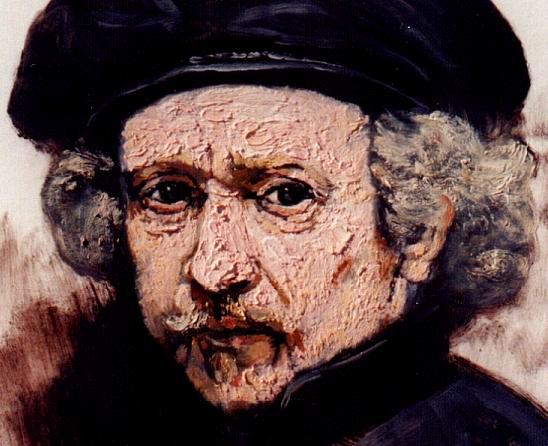
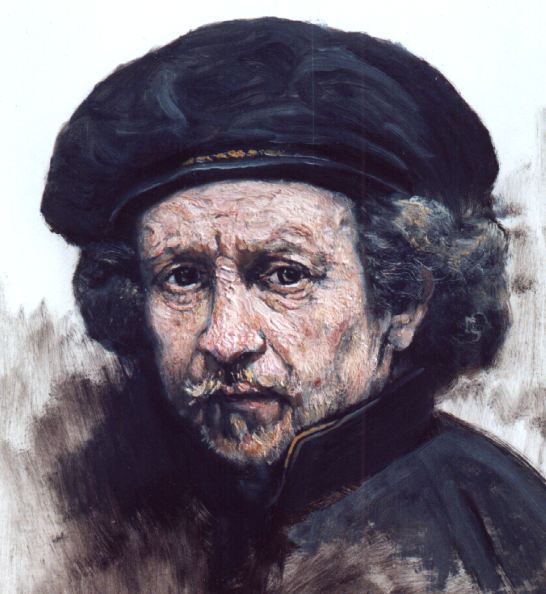
Rembrandt's Portrait and a detail shown below.
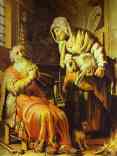
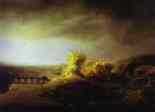
Of the many self-portraits created by Rembrandt in his life, there is one in particular I am very fond of seeing. This portrait is certainly one of the highlights at the National Gallery of Art in Washington, DC. Standing before this larger-than-life-sized portrait, I scribbled some notes about color and texture.....and thought I just might soon take a try at copying it.
Finally, about three weeks ago, after obtaining several images of the portrait, as well as numerous experiments with paint, I felt comfortable enough to attempt it.
There has always been great mystery surrounding the technique of Rembrandt. It is often said his clever works cannot be accomplished with something such as oil paint alone; and that he added extras to his simple paint in order to achieve the odd and heavy brushwork we see today.
Rather than expound on possible mysterious means at this introductory junction, I will get right to the chase. My primary efforts were to see if a heavy application of paint could be used to "sculpt" or fairly imitate the topography of human skin; and if this could be done with what I term regular materials, such as those commonly prescribed down through oil painting history. Of course, my secondary goal was to see just how close I could come to a fair repro of R's self portrait.
At this time of my writing, my copy-work is completed. Over the years, I have seen enough of R's works to familiarize and essentially fathom his basic method, which was pretty much the layered-method of all portrait painters of his time period. He usually began by applying a thin brownish monochrome to a likely white lead-primed support. Where he appeared to 'jump ship' from the other painters is in regards to his paint consistency. I feel it safe to say the man loved thick paint. He would apply thick toned dead coloring to such monochromes, especially where the light fell boldest, then tool and re-shape the thick paint to create a clever impasto-ish characterization -- in some instances, my own eyes do see a good similarity to, or at least an impression of, actual skin stretched or wrinkled over underlying bone. Finally, after allowing his modeling to dry, he would, like most others, suitably glaze, scumble, and highlight with a few added details.
I'll describe my own method. I divided up the work into four stages: a monochrome, a grisaille, what I call a relief "mask" in "dead-colored" flesh tones, then a final glazing and scumbling process. I hereby make it known that we have nothing written by R himself to say what materials he utilized. As such, we are left to our own take on the matter. I will only assume Rembrandt chose the best and most expedient means to creating his works (they seem to have lasted well, though, no doubt, some good many conservators have had a hand in that). I further assume this to mean his paint was stable and non-wrinkling, fast- drying for obvious ease in completion of his typical layered technique. I also presume he used but a very few colors, mostly the earths. As a painter, I fully believe this basic route was his own. Therefore, I chose my "tools" according to what experience has shown me to deliver the same characteristics. Anyone thinking I am attempting to solve the mysteries of this painter-- or any other-- should always bear this in mind. Without R's own words such mystery can never be fully solved. Still, I have a great variety of means and methods at my ready. These "tools" of my life's primary activity were obtained through much painting experience and experimentation. Answers can often be found with such tools.
Stage 1: Initial monochrome. I made up some painting jelly and rubbed a thin layer over my primed and un-absorbent white canvas (my painting jelly is not megilp, but a gel of my own research). I did this not because R was known to have done it. Again, I have no words from his mouth to go by. I simply wanted my monochrome to dry quickly and retain my sketchy or smooth brushwork. I have found the painting jelly to be the better means to this end; and so I used it.
I had decided to commit myself to a normal scale portrait, not oversized as the original. My monochrome was accomplished mostly by use of a hog bristle round about 3/8 ths-inch diameter. Smoothing certain areas, like the "cap", was done by rubbing with the fingers. This monochrome stage took about an hour in the afternoon, then another half-hour later on when my eyes had a chance to rest. This rest helps me see where my hog-brush-drawing needed correcting. I did utilize a small liner to aid detail where necessary.
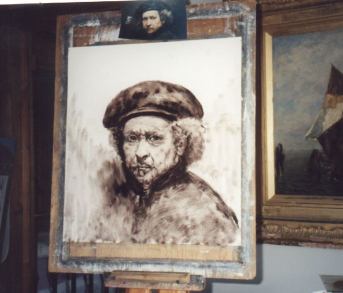
Though I was basing my mono on a small hazy photograph taken at the NGA (the small intro photo at the very top of this report), I was careful to include much info in my initial "road map"; this done so as to limit my decision-making later on. Viewing the monochrome, though it presents a fair likeness, a sort of anger is detected in the old fellow's countenance. No worry with that, as future painting stages ( layering ) allow correction.
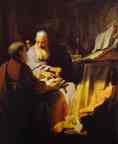
Below: though somewhat blurred by the color photography, this close-up of the brown monochrome reveals the typical effect from use of the painting jelly. As is found in many existing 1400-1600 Renaissance works [P.P. Rubens for example], such hatching marks of the brush are exactly preserved. This distinct hatching appearance can also be obtained by use of wax in the painting medium, though there is no evidence in written historical oil painting manuscripts regarding use of wax by painters before the 1700's. A similar effect can also be had by use of megilp.
I skipped a day for thorough drying, so that over-workings would not disturb this preliminary monochrome. Any mistakes made during over-painting above the monochrome could then be harmlessly removed by gentle wiping or even scraping with the knife. My mono "wash" was composed of carbon black and Venetian red formed to make a brown. Carbon black is a very slow drying paint. Thus, painting jelly was also added (about 25%) to the brown to expedite drying. The Monochrome dried to a gloss by the next day.
Stage 2: Grisaille in medium grey toned lead white. Again, to expedite drying, I used painting jelly as the medium and also as an oiling-out lubricant. This stage involved passing a rather thin, slightly greenish-gray over the whole work. A bit of black was used to help the modeling, and establishment of some strong darks in the shadows. A firm hog brush allowed me to pull the over-paint away here and their to reveal the monochrome brown and help the modeling illusion. The whole dried to a high gloss and I again skipped a day before commencing stage 3. After painting the grisaille, I was becoming familiarized with the likeness, and that is only a good thing. Interestingly, many of R's paintings are dead-colored over just a simple brown monochrome with no grisaille visible. Still, and though I cannot be certain, I am thinking R sometimes used this greyish grisaille, as it seems to be visible here and there, peeking through his applied, often thick "dead" colors.
Stage 3a: The mask in bold relief. R likely introduced some heavy relief into his grisaille stage. I do believe I detect such a build-up in parts of his portrait. But I also realize there is plenty of topography in his thick colored applications, so I decided to concentrate on capturing a good likeness with smooth paint for the grisaille and leave the sculpting to a colored layer.
I mixed up some batches of white lead and tinted all with Venetian red to a medium pink--about the tone of normal skin, but darker, so that some pure white on my uncleaned 'pink' brush could be brought in at any time to help with modeling. I've never resorted to mixing up a variety of tones when attempting a portrait. I do the various shades of the different planes of a face or figure mostly "on the fly" by working in amounts of white (or dark) here and there as needed. And I figure the old guys did pretty much the same. Thus, my white would be used to produce lighter values and highlights as the mask progressed, so that the final result would be close to a modeled face, both in texture and in sculpting relief. This sculpting with the paint contributes most of what we associate as being Rembrandt's marvelous impasto.
Making paint. Basic paint is made by rubbing pigment and oil together with the knife just before use. I prefer to use an oil that is not too fresh and not too aged. If it is too fresh, it will form 'short' stiff, crisp paint but will need an over-amount of oil. You see, fresh oil lacks a certain 'wetting-ability', or wettability towards making creamy paint. By contrast, oil that is too aged, or oil that has been heated at low or high temperatures to artificially age it, will produce 'long', gooey, stringy paint that appears to melt after it is applied. That's not to my liking at all. Here's the problem: short paint can be made long by slight additions of long or tall oils. Regular oil, like I use, can be made crisper by, say, small additions of oil resin varnishes (like copal, amber, or certain coniferous oil or spirit varnishes). Sadly, aged oil-made paint cannot be helped by additions of such resin varnishes. Such paint merely remains long, melting, leveling, and there is no use in my life for such things. I am speaking here of handmade paint-- which is what R would have used. Modern tube paint is a whole 'nother world. I do believe it is nearly impossible to create the look of R's paint with "tube paint" due to the necessary stabilizers required to give that stuff a shelf life, additives that condition and make it appear fresh when the painter buys it. It's not fresh, and it will never behave like fresh. [ The olden painters often kept their paint in bladders for ready use. How did they keep the paint from becoming too long too quickly? I suspect they simply added a couple of drops of pine spirit varnish to the mix. This gave the paint some excellent shelf life. BTW, as late as the mid-20th Century, pine gum thus was still being used by some artist's paint-makers for this very purpose. It may still be in such use.]
I should say something else on this matter. Hand-ground paint will set-up as the brush leaves it and then it will dry in that condition. However, the oil in the paint begins a quick trip towards polymerization. This happens to a noticeable degree within hours. Attempts to keep the paint crisp by further additives to the pile on the palette are to no avail --there is too much poly-damage done. Thus, if you want your crisp brushwork to remain so, do not work over the area. Then again, this onset of poly-effects in the paint can have advantages.......as well as cause innumerable painting experts within the last century to see the frequent use of stand oil among the old masters where there was nothing of the sort. For example, say you paint a nice blue sky and graduate the tones properly from horizon to zenith. A fine job but the brushstrokes show themselves ...and your fetish for realism would rather the whole was a glassy smoothness. Solution, use basic paint rubbed up with raw oil, wait overnight, then take a soft brush and gently stroke the whole sky. It will melt and levelize as if you had painted the work with additions of standoil. Knowledge and use of this characteristic will allow sections of your painting to go from short to long where desired.
Back to the subject at hand: I had previously done much testing with handground material and slowly evolved a rationale behind the odd texture to R's paint. Essentially, I had found three methods likely to obtain the necessary effects I had observed in R's portrait. These were:
1) Thickly ground white lead paint with no additives. Owing to my oil's age and condition, this produced a thick and gooey/stringy consistency, though it didn't 'melt', and meaning it was usable for the task. There is something rather odd about lead carbonate. You see, lead carbonate, regardless the method of its manufacture, will tend to make gooey stringy paint. Like I said above, if I were using a fresher oil, my paint would have been more short and crisp ...but it would contain more oil, as short oils are less wetting to pigment consistency. I was determined to try this simple basic white lead alone, even though science has detected some sort of heat bodied oil in R's impasto. [Personally, I was raised with a healthy respect for science and that method, but, over the years, my admiration for it has been shaken. As it stands today, I am reluctant to put faith in the increasingly conflicting findings of science, especially in matters so confounding as oil painting. But that's me, and I hope my own reservations do not taint your's.]
2) Not as thickly ground white lead (meaning a touch more oil in it) with a few drops of either spruce Spirit or Copal Spirit, or my Drying Copal Varnish. Both spirit varnishes (as well as many other types) allowed a shorter and stiff, crisp paint, but no real drying advantage. By comparison, the crisp paint made with the Drying Oil Copal was dry overnight and set nicely. [I value this speedy drying in thick applications and have wondered why there are reports maintaining R never used driers. This cannot be determined with any certainty. Why? Simply because lead was undoubtedly the most-utilized drier in 1600's painting....and lead carbonate is the main ingredient in R's thick white-based paint. Ergo, any drier based on lead will be hidden by the abundance of lead already in the ‘soup'.]
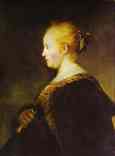
3) Not as thickly ground white lead with a few drops of my Heat-Bodied Oil-- in this case, a fast-drying litharge-cooked version made with walnut oil instead of linseed-- which stiffened the pile better than (2), but involved no resin-use. Through a previous experiment undertaken last year to copy the textile shoulder area of Rembrandt's "A woman bathing", I had concluded this particular heat-bodied oil (though it was based upon linseed oil, and not walnut oil) was a perfectly suitable means to getting the bold impasto of R's white. After that episode, I was satisfied the use of such a weird heat-bodied oil could, indeed, be a possible choice to R's brushwork. Still, there are many and differing means to differing works, especially as the means might change throughout a painter's life. The paint-chip detectives have not finished their work yet ...and I suspect they never will.
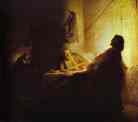
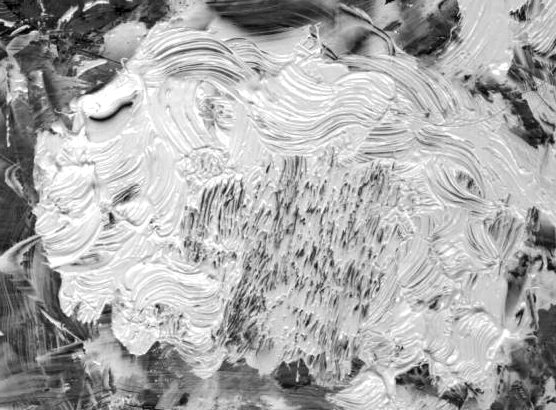
I began with the stiff, crisp type paint made by process (3) and everything went well enough. Here is a scan showing the type of paint made by using the HB Oil:
The underlying grisaille was easy to follow, though my progress was slow as I wanted to follow R's brushwork as closely as possible. There are some places throughout his work where the stroke or jotting stipple in the laid impasto does not seem to match natural facial topography, though I would agree it all works well for Rembrandt, no matter. Also, though things were going well with the round hog-tool (a 3/8- inch wide somewhat stiff and worn cheapy), I quickly found the knife to be often a much better tool for applying the thick paint in a "Rembrandt-ish" manner, and my brush would afterwards be brought into play to go over and "perfect" the contour-following thick knife-strokes . On one occasion, a particularly brisk contouring of the nose led me to some interesting insights-- though more on that later.
Presuming some readers might be skeptical of R using a knife, the following image is a small sample of some typical Rembrandt-ish strokes. These were made using the knife alone to apply white lead paint:
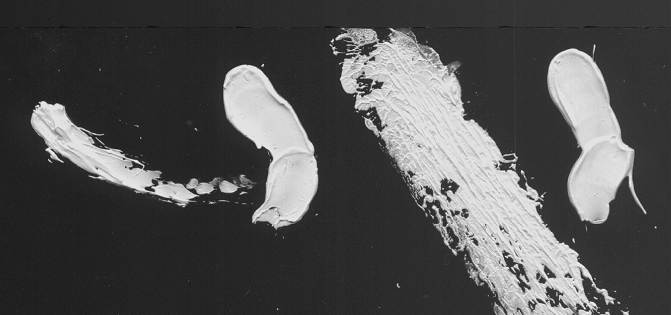
Those who have studied R's work will agree, these typical knife-strokes are commonplace in that master's performance. Often, such knife-work was quickly re-tooled with the brush. But not always. The stroke to the far right was made with straight heavy cream white lead paint. The other three were made after a drop of Drying Copal Varnish was added. Note they are more crisp and less stringy in simple application. I also suspect the slight amount of copal added will allow those particular strokes to remain better standing over time. Seen in five years, the one on the far right will be noticeably flatter, while the three made with the slight addition of copal will be hard and still appearing as left by the knife. Such is the power of a small drop of oil resin varnish-- the paint topography lasts like gangbusters. But this interesting property common to Rembrandt's work does not necessarily prove R used resins with his paint. Or does it? There is a slight battle raging in my brain. You see, it is possible an addition of a drying agent such as fresh olio cotto (lead paste) will cause a similar stiffening reaction as well as speed the drying and longevity relief of the thick paint. And again, the absolute crispy-est addition I've come across is the odd heat-processed HB Oil -- which contains no resins and is not to be confused by common heat-bodied oils, such as standoil. For the case herein, the drying walnut HB Oil was the additive mostly utilized in my own copy attempt to body my paint.
Interestingly, many of the knife-made strokes I produced seemed to look close enough without extra manipulations of the brush. The bumpy bearded areas of R's left cheek were easily made by jotting the paint on with the flat blade of the knife then applying a sort of up-and-down slapping/pancaking motion over the whole area. Little peaks of paint were the result. After setting-up well overnight, these were slightly smoothed down and rounded by a very gentle soft brush-stroking . [I doubt the trick would have worked were I using tube paint.]
After getting the "hang" of the mask sculpting, I switched to the pure un-tempered thickly-ground white lead pink and encountered trouble-- every stroke was leaving a "string" tail that drooped with gravity owing to the near vertical support ( I do think I detect some strings in some parts of R's work, but they are not manifest, and it should be noted that even crisper conditioned paint can sometimes emit a string). A further thinning of the thick pure paint allowed better execution, but the strokes were weak and produced lower topography. [ I do know something else about thick paint. If made with linseed oil instead of walnut, strong wrinkling will exhibit itself as the material dries. Such wrinkling increases with additions of polymerized oils. Plus, something else to consider, oily paint will not hold up and keep its impasto and brush topography over time. Time has a way of slumping it. It becomes smooth. This is one reason why resins like copal and amber were good additions to paint. Resins have a way of stopping the slumping of the oil. Rembrandt's brushwork in many places retains the clever track of the brush, and this visual clue has allowed artists since his time to remain convinced the older painter incorporated small amounts of some resin with his material. Wax was considered another possibility. But I do not suspect it (all I will say on that matter).]
Seeing the stringiness, I scraped the untempered paint off the grisaille and went back to the tempered type. [ Again note: I presume a very fresh oil that is more favorable to producing rubbed-up "short" (crisp) paint would negate the tailing situation, but I know from experience such oils are difficult to make paint with, resulting in over-amounts of oil; such over-saturated paint would, within an hour or so, become slumpy. Thus, I prefer, and also assume other painters would agree, a better aged and noticeably longer oil does the better job for rubbing up paint, even though a "tempering" addition (such as a resin varnish) is required to make it behave according to whimsy. Above all, a workable paint requires less of this type oil than the fresh short type.] If anyone out there wishes to attempt the straight paint, your efforts would be welcomed. I will always agree, whatever method works in one man's hands may not fit another. [BTW, I did try the Drying Copal Varnish-tempered paint in a small section and found it performed quite well. Ditto the spirit copal and coniferous varnishes; but I presume the spirit type varnishes would be easily detected if they had been involved with R's paint. Of course, such resins have not been detected in his paint. That leaves the oil copal varnish as still a good possibility-- it having been made by cooking copal into oil at an extremely high temperature, causing a certain molecular combination and altering/destroying the normal "fingerprint" of the copal resin. Very little of this fast-drying copal varnish was required to get the heavy ground paint to stand well and leave a probable non-deteriorating stroke of the brush. I have to pronounce it a very expedient temper for getting the proper effects in the mask as well as the finishing stage.
Again (and again), you will see my reference to a "drying" version of tempering agents. I cannot speak for Rembrandt merely because I attempt to copy him. And so you must take my words as only what they are. They are this: I believe, above all else, R's paint had to be drying. That is to say, it had to contain a drying agent. On this point, I cannot consider a situation otherwise. Lead white is a faster drying paint, but in the case of thick applications, it needs quite a boost-- that would come from adding a lead-cooked drier.
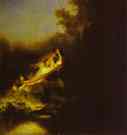
This image shows the heavily-applied paint photographed in raking side-light outdoors:
My brushes were rounds, none over 3/8 inch, and a thin liner (which was essentially useless with the thick crisp paint, but would come in handy for final nuance strokes with thinner paint). As I said, I began applying the pink material bruskly over the grisaille using the photographs to guide my strokes, which generally followed the contours of the face. I feel that if I hadn't had to try to closely follow R's topography, I could have completed the work in about an hour (with time later-on, after my eyes rested, to make some simple corrections). Much of the brushwork shown in the photographs of R's self portrait were deduced by basic trial-and-error (the route to all learning) and only a couple of places presented difficulties--mostly within the nose area. Correctability was easy and anything applied that didn't fit well could be easily removed with the knife and a fresh attempt would follow. The underlying grisaille was very tough and nothing harmed it. When finished, the mask looked too cold and I was champing to begin some dead coloring. I decided to add a touch of redder VR coloring around the mouth and a slight bit of yellow ochre to the mustache areas. I also mixed up a bit of weak brown using only the VT and YO, and I added that color to the areas below the eyebrows.
Mask, part b- Dead Coloring After waiting overnight for proper set-up and resistence, I deftly passed a thick but soft round 3/4- inch hog brush over some sections of the mask's relief and obtained more of a melted appearance here and there. I had noted this methodology being used by R in many of his works, where it was obvious a thick initial paint had been mechanically "melted" by a later stroking with such a soft brush-caress. Again, no standoil, boiled oil, or sunthickened oil was required for getting this effect.
I was so enthralled with the additions to the previous day's mask that I begain a slight experimental dead coloring, while trying not to distub the drying thick paint -- I didn't want it all to melt by my manipulations. I achieved a few corrections but deemed it best to leave the whole as it was.
The next day, all seemed dry enough and I began the dead coloring of the mask in ernest, encountering no real difficulty. Instead of various tones of pink, I was now using a more yellowed color (Yo and white lead + VR) and this seemed to glow nicely where it skipped and scuffed across the underlying previously applied and now set-up pink made with VR + white alone. The mask was becoming thicker but also smoother. It has been often retold how R's portrait faces were so thick that one could lift them by the nose. I believe there is some truth to this old quote. His works must have been considerably thicker than the norm to arouse such remarks. But, if so, the impression presented today is much flatter. Certainly there is nothing available today approaching the thick character indicated by the old remark. Then again, do realize, Father Time has his way of flattening oil paint (and so do restoration attempts such as heat and pressure re-lining canvases). Of course, oil paint being what it is, too thick a build-up in too quick a manner will lead to the A.P.Ryder effect; and that effect is not evident in R's work.
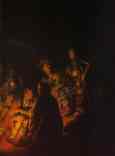
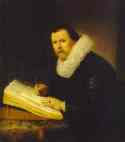
The following image is close to the way the mask looked after the dead coloring stage:
The work as shown is already fully dead-colored but it also has some final finishing aspects. You see, the hair and other areas were dry and could be glazed....and I got carried away and forgot to take a completely intermediate photo. To describe one application in particular, there is a shadow glaze scrubbed over the hair areas, then the sgraffito brush-handle tip "hairs" were simply gouged into that wet thin shadow. I used painting jelly as my thixotropic vehical for glazing the shadows, which allowed the etched-in hairs to keep themselves and not run or fuse. Some say this keeping and non-diffusing of the essentially scratched-in singular hairs indicates R used some sort of thixotropic vehical for glazing. That could be. Reynolds saw this and suspected a bit of wax in the make-up. But there are other ways to get real or apparent thixotrophy without wax.
About "Dead coloring" and final glazing/scumbling: dead coloring is a stage wherein you mix tints in colors and apply them basically above your monochrome, or grisaille, and in position essentially where they should finally go. The problem is, these colors--traditionally made with earths and umbers-- are comparatively "dead" or rather mundane and lacking saturation. This is why the glazing/scumbling stage occurs. The pure and saturated colors, often the very same earths ( typically pure, though some may be mixed with a titch of white for scumbling) are thinly applied over the dead colors to give them amazing color-depth and brilliance. Even a glowing red sunlit cloud at sunset requires nothing brighter than a thin glaze of , say, Venetian red over a dried pink made by VR and some white --and many a landscape painter has caught such a glowing effect in just this way. I should note the underlying dead colors should be fairly close in correct tone and color values before glazing for best optical results. Glazing is then carried out with very slight and thin coatings.
Some today recommend starving the glaze of medium, but I belong to another school, and believe they should be rich in my chosen glazing/scumbling medium (the type of medium is very important). If parts of the work are too hot or garish, or I wish for more smoothness, scumbling is in order. Thinly-applied semi-transparent films made with a touch of white will usually provide an array of ethereal coloring effects to the final impression. In R's heavily-textured situation, I can believe scumbing and glazing provided much towards the amazing final effect. I should add that finishing is an art unto itself; and not all can do it effectively. Nowadays, portraits are usually produced with brighter colors. As such, dearth in coloration is not readily apparent to the casual viewer. Yet such examples will usually "die" if they are hung near portraits that have been properly glazed and scumbled, thus giving off that optical richness we associate with the olden works seen at the museums. Again, a proper glazing medium is required for the proper effect.